Adding a Contact
➕ Creating a New Contact
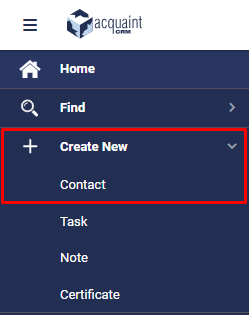
To add a new contact to the system, follow these steps:
From the side navigation bar on the left, click the Create New button.
In the options that appear, select the Contact button to begin creating a new Contact record.
✅ Tip: Make sure to select the correct Contact Type to ensure accurate data handling.
https://youtu.be/ZYYRshOg1UA
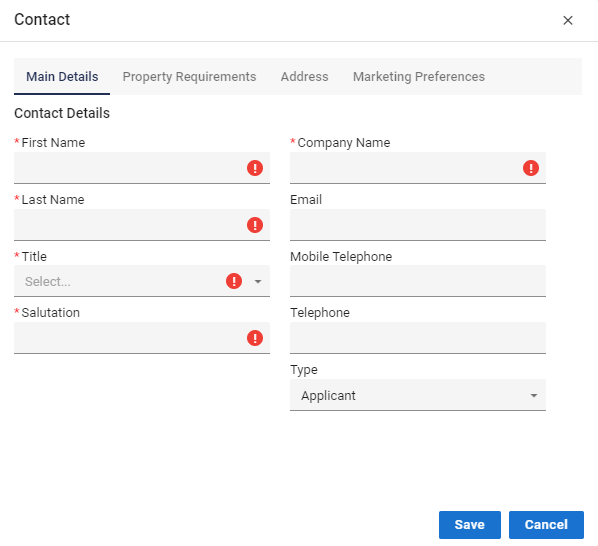
🧾 Contact Screen Overview
The Contact screen is divided into multiple tabs, each designed for entering specific types of information relevant to the individual or organisation you're working with.
When creating a new Contact, certain fields are mandatory and must be completed before saving the record. These include:
First Name
Last Name
Title
Salutation
Company Name (if applicable)
⚠️ Tip: Mandatory fields ensure key information is captured consistently—watch for asterisks () indicating required entries.*
🏢 Company Name Requirement
The Company Name field is conditionally mandatory:
If First Name and Last Name are not entered, then Company Name becomes a required field.
This applies to records like utility suppliers or service providers:
These contacts typically represent a business rather than an individual.
In such cases, Company Name should be completed, while First Name and Last Name are usually left blank.
✅ Tip: Use Company Name to ensure business records are accurately stored even when individual contact details aren’t applicable.
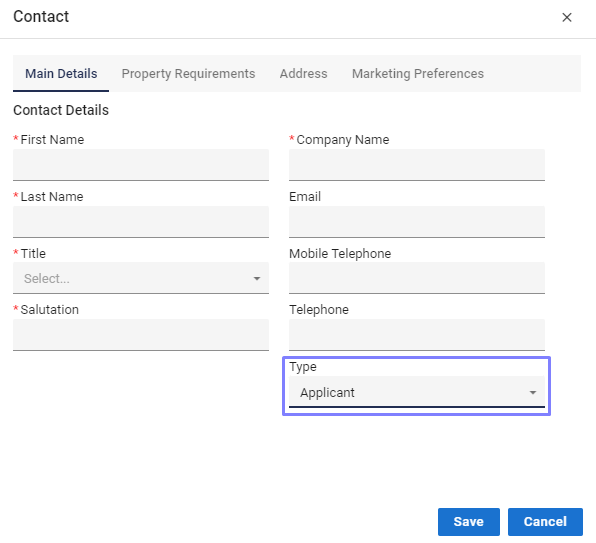
🧠 Selecting the Correct Contact Type
Choosing the appropriate Contact Type is essential for accurate data handling within Acquaint. This selection influences:
How contact details are organised
How the system processes interactions
How information is displayed across modules
Assigning the correct type ensures each Contact is categorised properly, enabling smarter automation and easier navigation.
✅ Tip: Review the Contact’s role carefully before selecting the type—it streamlines communication and improves data quality across your workflow.
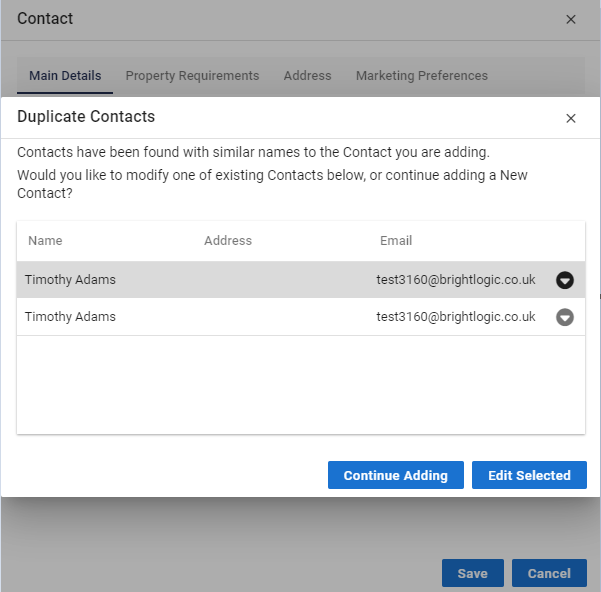
🔁 Duplicate Contact Check
When entering a new Contact, Acquaint automatically checks for existing records using the First Name and Last Name fields.
If a match is found, a popup notification will appear to alert you that a Contact with the same name already exists.
⚠️ Tip: Always review the popup details carefully to avoid creating duplicate entries and ensure data integrity.
✏️ Adding or Editing a Contact
When managing Contacts, you have two options:
Continue Adding a new Contact by completing the required fields.
Or, choose one of the existing Contacts (highlighted in the list) and click to edit the selected record.
To view additional information:
Click the down arrow located to the right of the email address. This expands the Contact’s details for quicker reference and updates.
✅ Tip: Use the dropdown view to confirm key details before making edits or creating duplicates.