
Diary Syncing
🔄 Diary Syncing Explained
Diary syncing ensures that your appointments remain up to date and consistent across multiple platforms. For example, when you create a new appointment in your Acquaint Diary, it will automatically appear on your linked Gmail or Office 365 Calendar—keeping all your calendars aligned in real time.
⚙️ User-Level Configuration
Syncing is managed per individual User via their Profile settings:
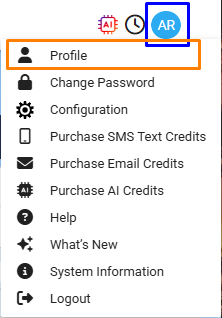
Navigate to the User settings from the profile menu.
Locate the Sync Diary Level setting to customise your view preferences.
You can choose to:
View Only My Appointments
Or access Everyone’s Appointments, depending on your role and access needs.
✅ Tip: Selecting the appropriate sync level improves visibility without cluttering your calendar - perfect for balancing personal tasks with team-wide scheduling.

🔄 Default Diary Sync Period
By default, Diary entries sync for the upcoming seven days only. This helps streamline calendar data and maintain system performance.
If your scheduling needs require a longer or shorter sync window, you can customise this setting through the Site Branch configuration.
How to Modify the Sync Period:
Go to the Profile Menu
Select Configuration
Navigate to Site/Branch → Appointments
Locate the setting Diary Sync Period (days)
Enter the desired number of days for syncing future appointments
✅ Tip: Adjust the sync period to match your team’s scheduling habits—whether you're planning short-term or managing longer appointment cycles.
🔗 Syncing Your Diary with External Calendars
Acquaint Web offers two integration options for syncing your diary:
Google Calendar
Office 365 Calendar
Getting Started
Before syncing, ensure you have an active account with either Gmail or Office 365.
How to Sync Your Diary:
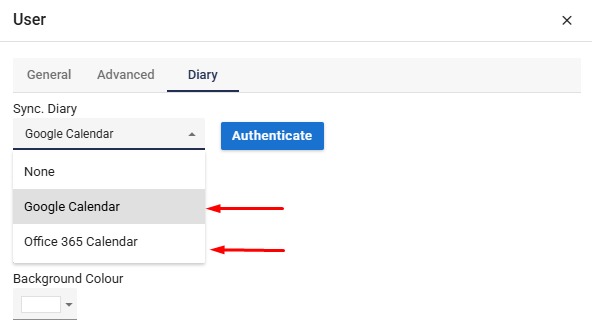
Navigate to the “Sync Diary” field in your profile settings.
Use the dropdown to select either Google Calendar or Office 365.
Click the Authenticate button on the right-hand side.
Depending on your login status, one of two things will happen:
If you're not logged into your chosen account, you'll be redirected to the login page.
If you're already logged in, you'll go straight to the authentication page.
Final Step:
Copy the authentication link provided on screen.
Paste it into the designated authentication box within Acquaint to complete setup.
✅ Tip: Once synced, any updates to your Acquaint Diary will automatically reflect in your external calendar, keeping you organised across platforms.
🔄 Office 365 Calendar Sync (One-Way Push)
The integration with Office 365 Calendar uses a one-way sync (push only) from Acquaint to Office 365. This means:
Appointments you create in Acquaint will be pushed to your Office 365 Calendar.
If you delete an appointment in Acquaint, it will also be removed from Office 365 Calendar.
However, any changes made directly in Office 365 Calendar (additions, edits, or deletions) will not sync back to Acquaint.
⚠️ Important: To maintain consistency, always manage appointments from within Acquaint when syncing with Office 365 is enabled.
🔁 Google Calendar Sync (Two-Way)
Acquaint Web supports a two-way sync with Google Calendar, allowing appointments to be shared and updated seamlessly between both systems.
📥 Appointment Import to Acquaint
Acquaint automatically imports appointments created in Google Calendar since the last Diary sync run date.
Imported entries are assigned the Appointment Type: Calendar Appointment and marked as unconfirmed.
The appointment’s Title and Description in Google Calendar appear as notes within Acquaint.
🏷️ How to Tag Google Calendar Appointments for Import
To ensure an appointment is imported into Acquaint, include one of the following tags in either the title or description of the event:
*ACQ*(ACQ){ACQ}[ACQ]
🔎 Note: Tags are not case-sensitive, making it easy to use your preferred formatting.
🔄 Ongoing Sync Behavior
Once imported:
If the date or time of a Google Calendar appointment is changed, that change will be reflected in Acquaint during the next sync cycle.
✅ Tip: Keep appointments tagged and updated in Google Calendar to maintain an accurate record inside Acquaint.